1.  As on all other Leigh templates, the right side of each scale indicates the joint being routed. The scales are color coded green for square fingers and gray for rounded joints. In the square finger mode, there is just one setting for each of the F1's four guide combs.
2.  The VGS is mounted directly on the router baseplate. In some cases, a Leigh template guidebush adaptor may be needed. Adjusting the template guidebush up or down changes the joint fit .001" for each 1/8 of a turn. A full turn alters the fit by .008"!
3.  In finger-jointed corners, one board starts with a finger, the other with a socket. A template control pin positions the F1 guide combs for one or the other. Here, the icon shows you're ready to cut a finger board.
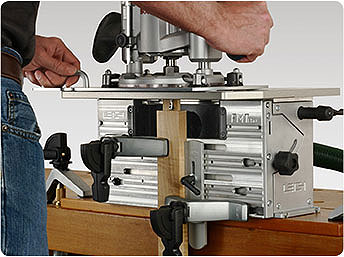
4.  Both finger and socket boards are clamped vertically in the jig. A straight or spiral upcut bit that matches the comb size does all the cutting for both pieces.
5. Remove the control pin, slide the guide comb sideways to the next position (the distance between finger centers) and insert the pin in the hole marked by the socket icon . The control pin positioning holes are always at the opposite end of the active portion of the comb and do not interfere with the router.
6.  That's all it takes to change from finger board to socket board mode. Rout the second half of your joint, adjust the fit as needed with the VGS and then produce as many perfectly fitted boxes as you please.
"Leigh Jigs are so versatile."
-Patrick Spielman, Router Jigs and Techniques